

Running a Messaging API bot with Cloudflare + Hono
Hello! I'm Zenigami, a technical writer in charge of managing the LINE Developers site. What kind of environment do you use to run your Messaging API bots?
One of the popular setups recently is Cloudflare + Hono, and you can absolutely run a bot with this architecture. In this article, I will introduce the minimum steps required to run a bot using Cloudflare + Hono.
Cloudflare Workers offers a free tier, so you can try all the steps in this tip for free.
- Environment
- Create a project
- Implement the application
- Set environment variables
- Deploy
- Check the behavior
- Conclusion
Environment
I have confirmed that the contents of this article work in the following environment:
| Name | Version |
|---|---|
| Node.js | v26.8.1 |
| create-hono | 0.19.5 |
| Hono | 4.13.9 |
| Wrangler | 4.144.0 |
| LINE Messaging API SDK for Node.js | 11.2.0 |
Create a project
First, initialize the project using a template provided by the Hono web framework. Run the following command to initialize the project:
When you run the command, you will be asked a few questions. Answer them as follows:
| Question | Answer |
|---|---|
| Which template do you want to use? | cloudflare-workers |
| Do you want to install project dependencies? | Yes |
| Which package manager do you want to use? | npm |
Next, install the LINE Messaging API SDK for Node.js. Using this SDK makes it easy to verify signatures and send messages.
Then, open the generated wrangler.jsonc. Add a comma at the end of compatibility_date and uncomment compatibility_flags. Since the SDK uses the Node.js crypto module for signature verification, we need to uncomment this to enable Node.js compatibility mode.
Implement the application
Now, let's implement the application. Open src/index.ts and replace its contents with the following code.
In this application, when a user sends a message to the LINE Official Account, the bot echoes 🦜 the exact same content back to them.
Set environment variables
Once the application is implemented, it is time to deploy it. But before you do, set the environment variables using the following commands. If prompted to log in to Cloudflare when running these commands, please do so to continue.
You can check your channel access token and channel secret in your Messaging API channel on the LINE Developers Console. If you haven't created a Messaging API channel yet, see Getting started with the Messaging API to create one.
For example, when setting CHANNEL_ACCESS_TOKEN, it will look like this. Since there is no Worker on Cloudflare at the time you run the command, you will also be asked whether to create a Worker:
Deploy
After setting up the environment variables, deploy the application. You can deploy it using the following command:
When the deployment is complete, the deployment destination URL will be displayed in the command output, looking something like https://my-line-bot.<YOUR_SUBDOMAIN>.workers.dev.
Check the behavior
After deploying the application, take the deployment destination URL, append /webhook to it, and register this URL in the LINE Developers Console. Open your Messaging API channel, and enter the URL into the Webhook URL field on the Messaging API tab, and then enable Use webhook.
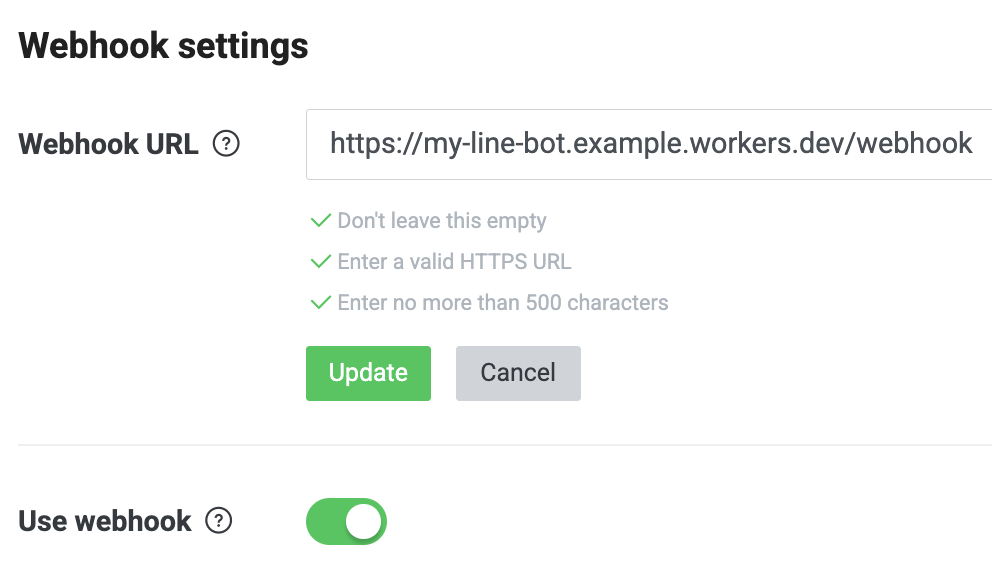
At this point, the setup is complete. Open your LINE Official Account and try sending some random text.
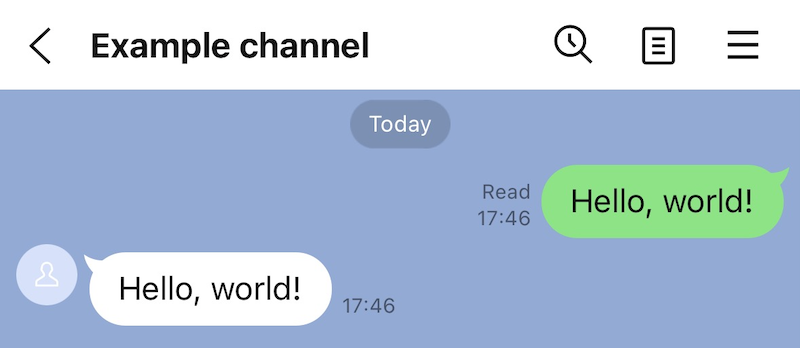
If the exact same text you sent comes back from the LINE Official Account like this, it's a success!
Conclusion
As described above, by using Cloudflare and Hono, you can easily get the Messaging API up and running. If you are ever wondering where to host your bot, please give this setup a try.