

How to test the Messaging API on Postman using LINE OpenAPI
Hello! I'm Zenigami, a technical writer. When you start developing with the Messaging API, have you ever thought, "I want to test how the API works before writing any code"?
Postman is widely used as a tool to easily test APIs via a GUI. By using our officially provided LINE OpenAPI, you can save yourself the trouble of manually setting endpoints, request bodies, and other details, allowing you to test the API much more smoothly.
In this post, I will explain the steps from importing the LINE OpenAPI specification file into Postman to actually sending a push message using the Messaging API.
Environment
I have verified the steps in this post using the following environment:
| Name | Version |
|---|---|
| OS | macOS 26.3.1 |
| Postman app | 12.34.4 |
The steps shown below may differ depending on your OS or Postman version.
Steps
Below are the steps for sending a push message using the Messaging API with Postman.
1. Get the URL of the LINE OpenAPI specification file
First, get the URL of the LINE OpenAPI specification file. The OpenAPI specifications for various APIs, including the Messaging API, are published on our GitHub repository.
To test the Messaging API, you will use messaging-api.yml in the repository. Copy the URL of the file shown below:
2. Import into Postman
Once you have the file URL, the next step is to load it into Postman. You can do this by following these steps:
- Open Postman, and click Import in the File menu.
- Paste the copied OpenAPI specification URL, and click Import.
- Once the import is complete, a collection named
LINE Messaging APIwill be created under Collections on the left.
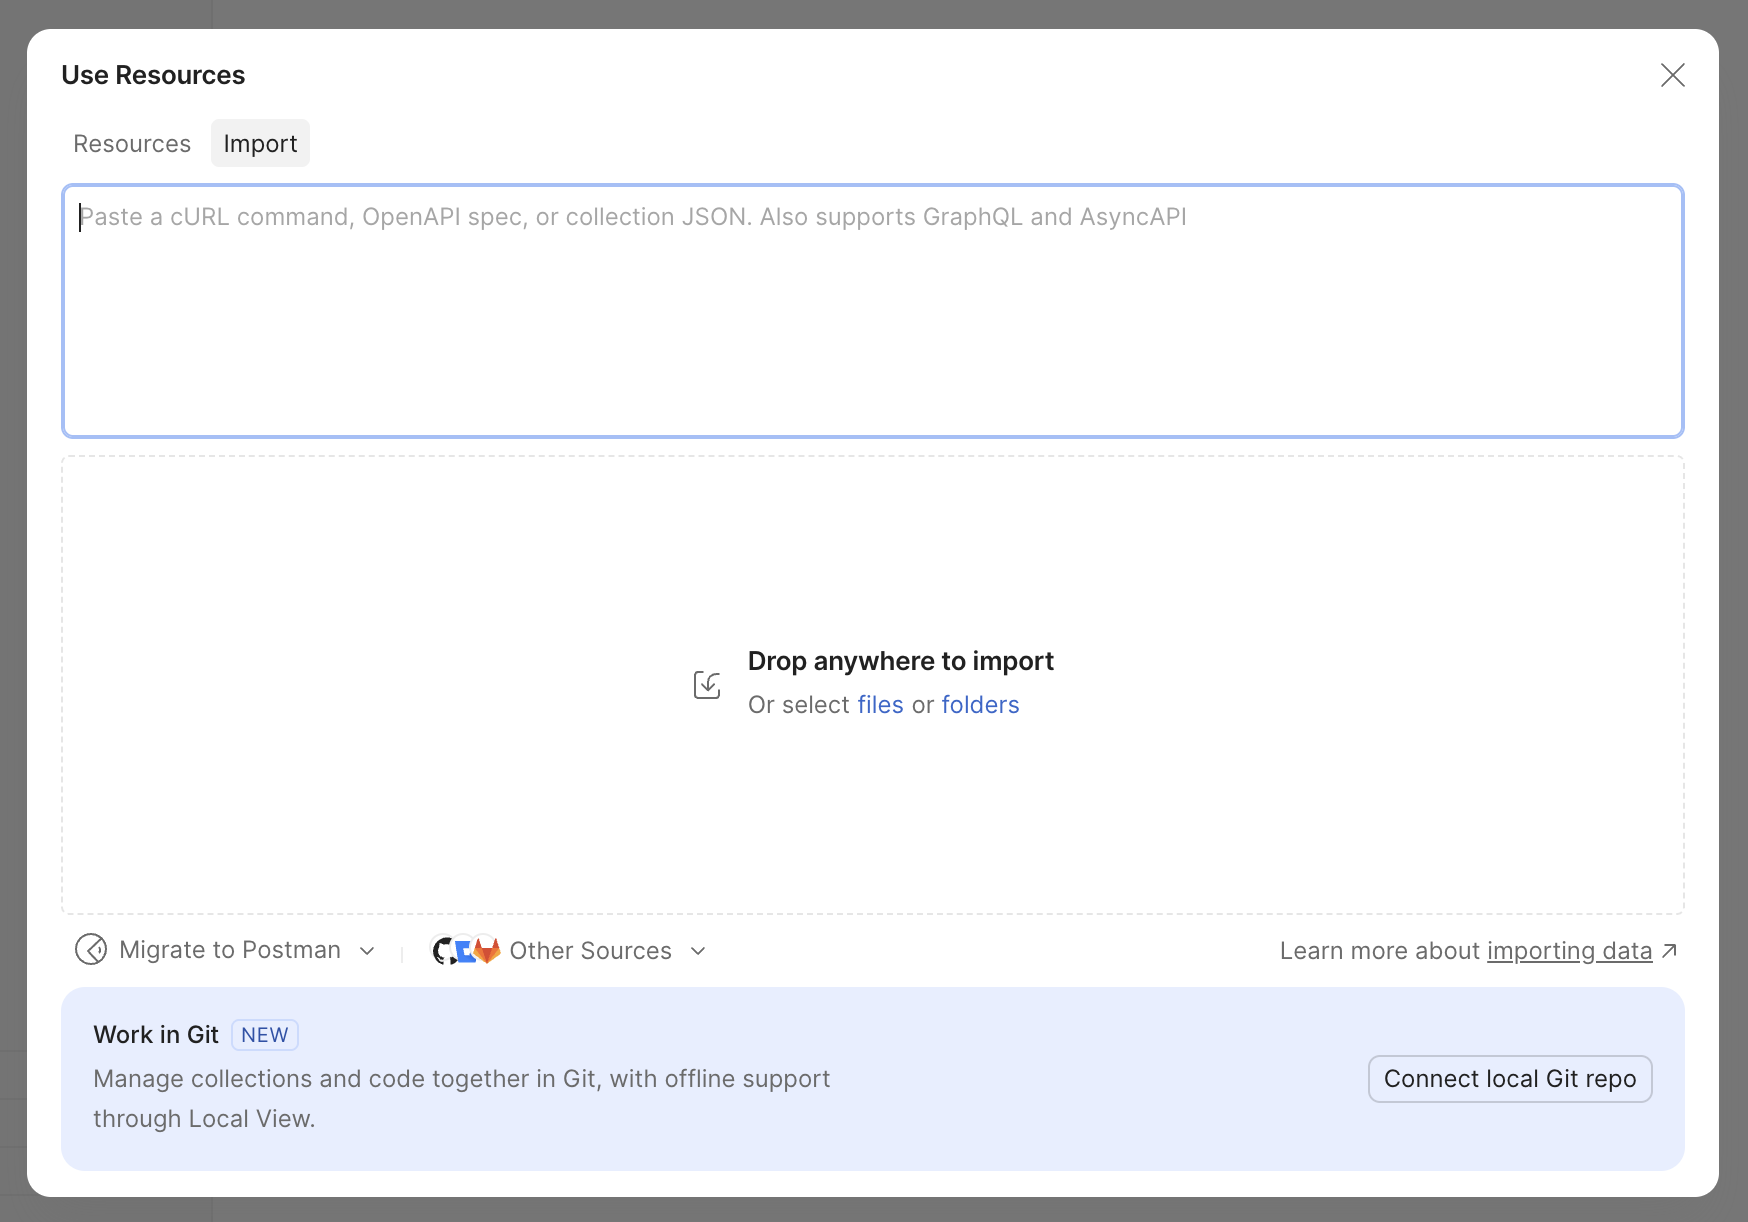
The structure of each Messaging API endpoint, including URLs, parameters, and request bodies, is now automatically configured in Postman.
3. Get a channel access token
To execute the Messaging API, you need to set a channel access token. For the purpose of verifying how the API works, it is convenient to use a long-lived channel access token.
You can issue a long-lived channel access token from the Messaging API tab of your Messaging API channel in the LINE Developers Console.
Long-lived channel access tokens are convenient and easy to issue from the LINE Developers Console. However, because they have no expiration date, they carry a high risk if leaked. Additionally, depending on how variables are configured in Postman, the values you enter may be saved on its cloud servers.
Use the Postman procedures introduced in this post solely for verifying API operations. In actual production environments, execute the API from your program using other types of tokens, such as stateless channel access tokens.
4. Set the channel access token
The channel access token you obtained in step 3 must be set in the request header. By setting it as a variable for the entire collection, you can execute the API efficiently.
To set it as a collection variable, follow these steps:
- Click the LINE Messaging API collection.
- Open the Variables tab on the right.
- Add a variable named
channelAccessToken, and enter your channel access token in the Value field. - Open the Authorization tab, and set the Auth type to
Bearer Token. - Enter
{{channelAccessToken}}in the Token field.
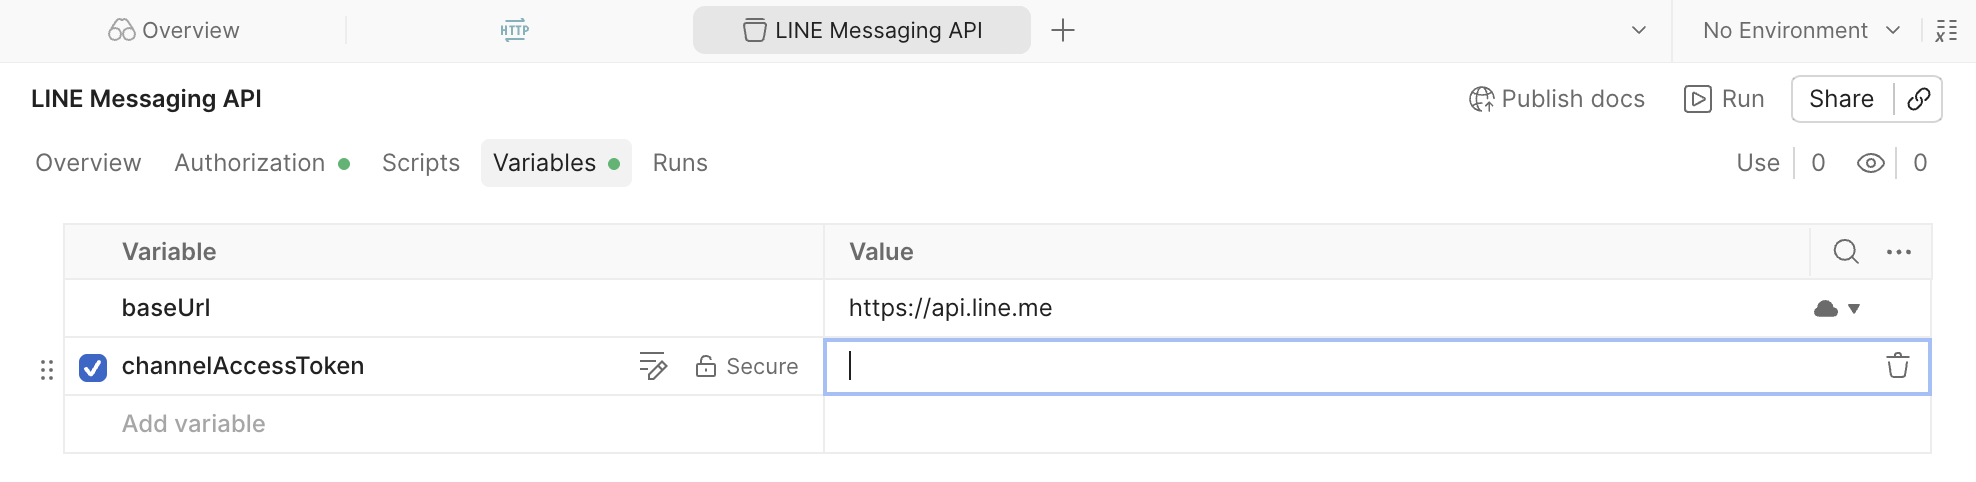
This will automatically add the authorization header to all requests within the collection.
5. Add the LINE Official Account as a friend
Later, you will send a push message using the Messaging API. To receive the message on the LINE app, you need to be friends with the LINE Official Account that will send the message.
If you haven't added it as a friend yet, scan the QR code found on the Messaging API tab of the LINE Developers Console using your LINE app to add it.
6. Get the destination user ID
Next, get the user ID that will be the destination of the push message.
You can find your user ID, which will be the destination, under Your user ID at the bottom of the Basic settings tab in the LINE Developers Console. Copy this user ID.
7. Try sending a push message
You are now ready to try out the Messaging API. Here, as a test, let's try sending a push message to yourself. Send a message by following these steps:
- Select the push message request from the LINE Messaging API collection:
- Open the Body tab and rewrite the request body as follows. For
to, specify Your user ID that you copied in step 6. - Click the Send button.
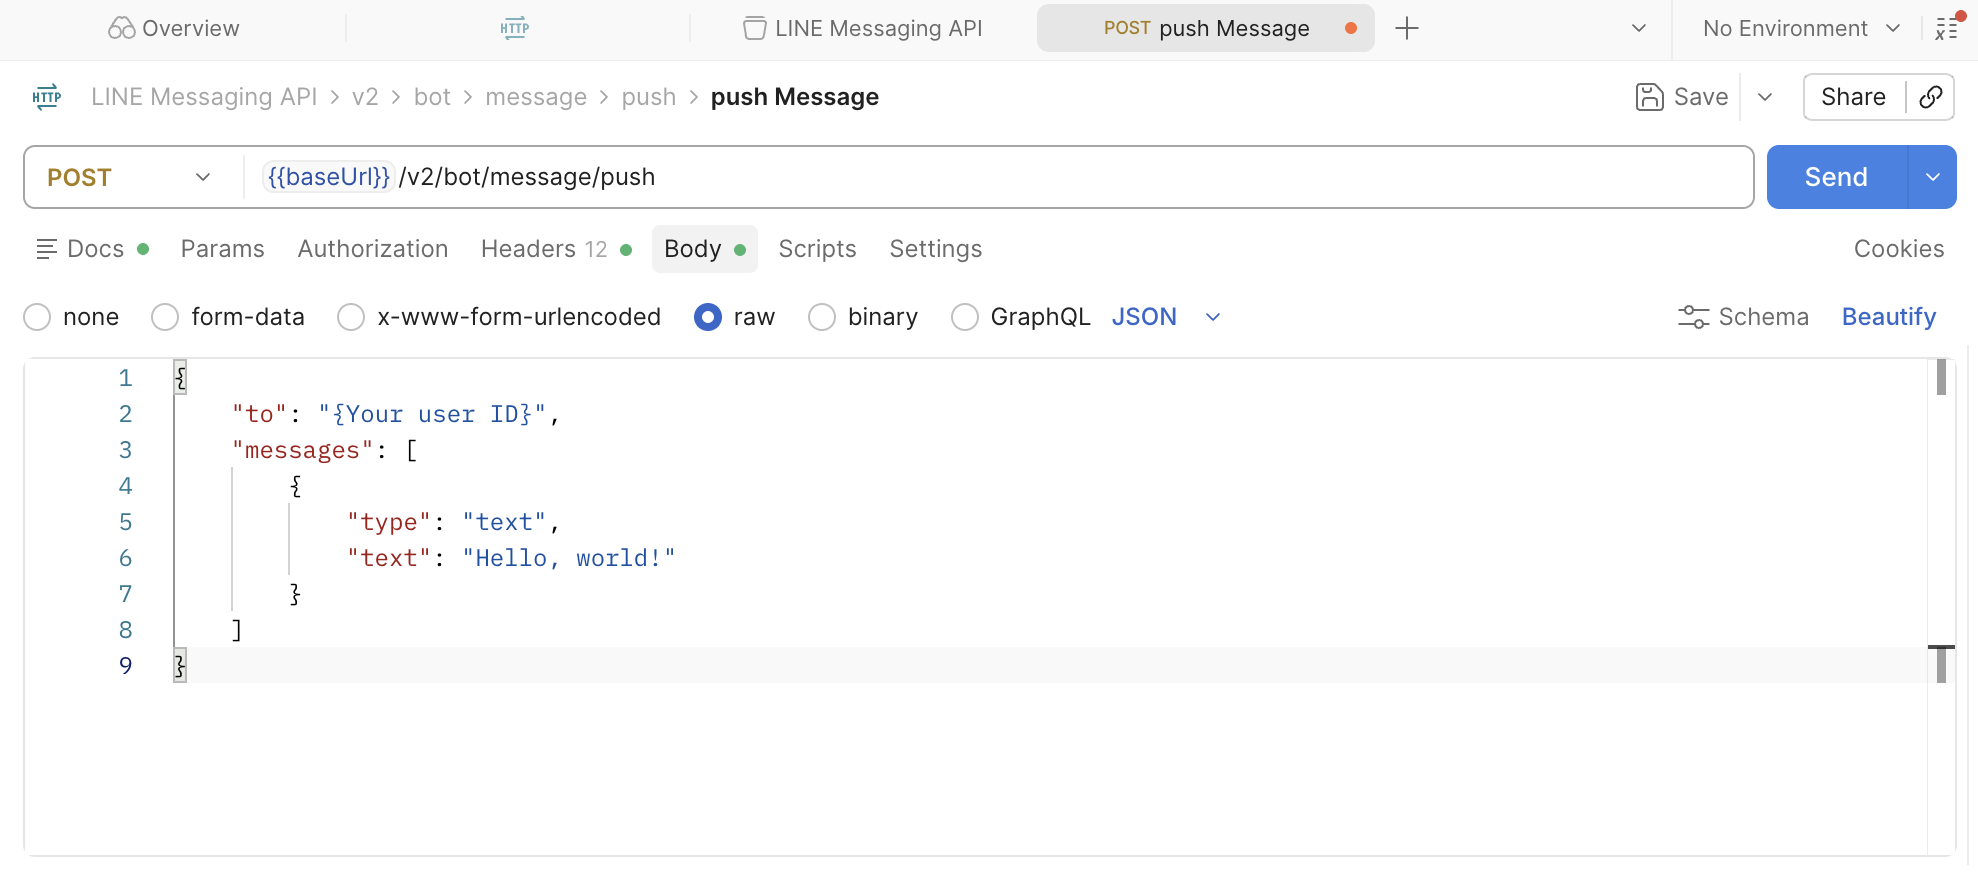
If 200 OK is displayed in the response section at the bottom after you click the Send button, the request was successful. If you open your LINE app, you should see that the message has arrived.
Conclusion
By combining LINE OpenAPI and Postman, you no longer need to manually type URLs and parameters while looking at the API reference, allowing you to easily try out the Messaging API.
The Messaging API has various endpoints, such as those for managing rich menus and audiences. Using this method, you can quickly test them out on your end. I hope you find this useful for streamlining your day-to-day development and testing.