Setting up your project
This topic explains how to integrate the LINE SDK for iOS Swift into your iOS project and apply necessary configurations.
To make your app compatible with the latest iOS versions and make full use of its features, we strongly recommend you follow this installation guide and use the latest version of the LINE SDK for iOS Swift.
Prerequisites
To build and use the LINE SDK for iOS Swift, you need:
- A provider and a LINE Login channel. You can create both in the LINE Developers Console.
- iOS 13.0 or later as the deployment target
- Xcode 14.1 or later
If you want to support earlier than iOS 13.0 as the deploy target, use an earlier version of the LINE SDK for iOS Swift. For more information, see Releases.
You can use the LINE SDK for iOS Swift with either Swift or Objective-C code. This guide assumes that you use Swift code to implement the LINE SDK for iOS Swift. To use Objective-C code to integrate the LINE SDK for iOS Swift, see Using the SDK with Objective-C.
Installation
The LINE SDK for iOS Swift is not compatible with previous LINE SDK for iOS Objective-C versions. If you are upgrading the version of the LINE SDK, see Upgrading the SDK before proceeding with the upgrade.
CocoaPods
If you aren't familiar with CocoaPods, see CocoaPods Getting Started Guide. You will need the CocoaPods gem installed on your machine before integrating the LINE SDK for iOS Swift into your app through CocoaPods.
- Once your Podfile is prepared, add the pod command below to your target:
- Run the following command:
The LINE SDK for iOS Swift will be downloaded and integrated into your Xcode workspace.
Carthage
Carthage is a decentralized dependency manager that builds your dependencies and provides you with binary frameworks.
- To install the Carthage tool, use Homebrew.
- To integrate the LINE SDK for iOS Swift into your Xcode project using Carthage, specify the GitHub repository of the SDK in your Cartfile as below:
- Run the following command to build the LINE SDK for iOS Swift:
Now you can add the built LineSDK.framework file to your Xcode project by following the steps described in the following sections.
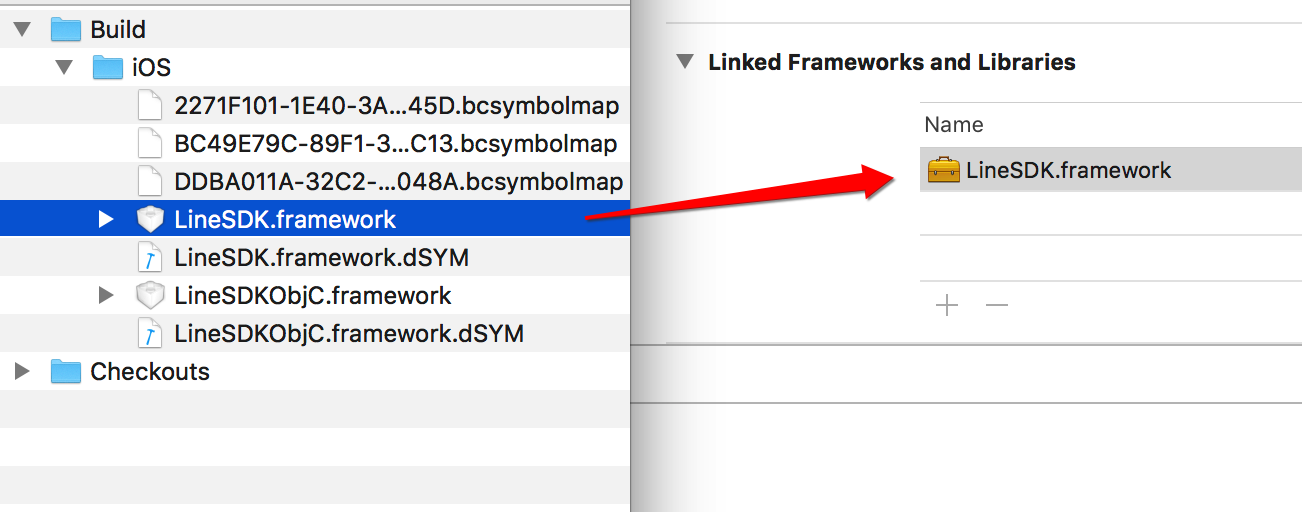
Linking the LineSDK.framework file to your Xcode project
Drag and drop the LineSDK.framework file from the Carthage/Build/iOS folder to the "Linked Frameworks and Libraries" section on your application target’s "General" settings tab.
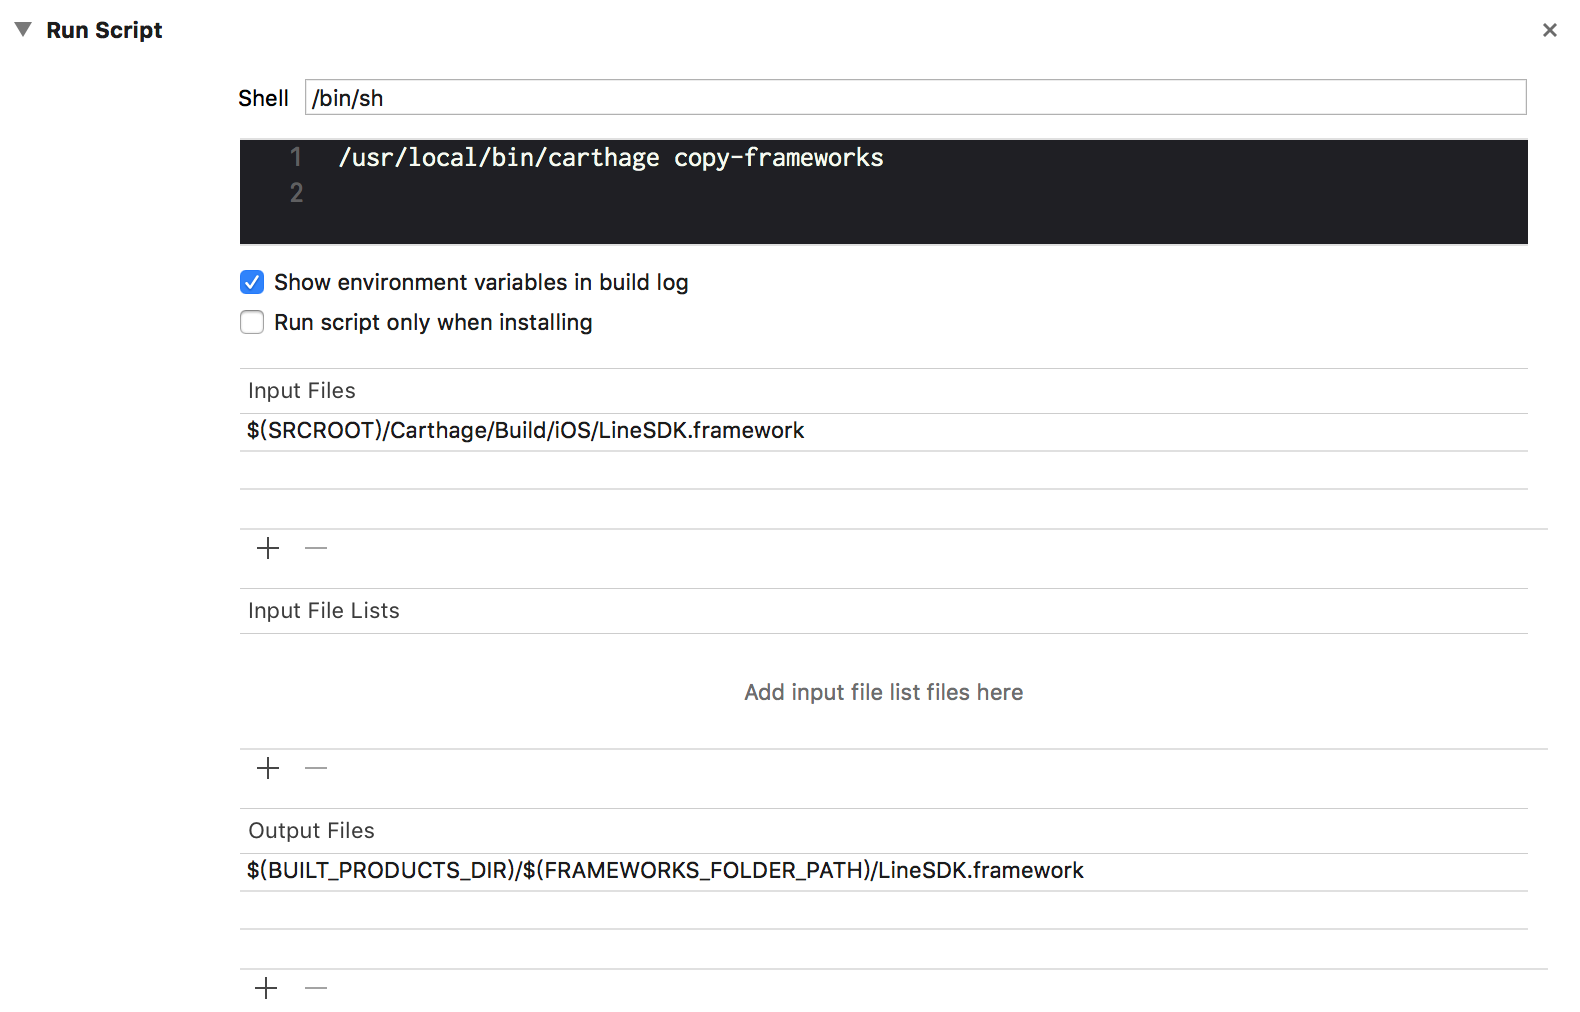
Copying the LineSDK.framework file during the build phase
- Click the + icon on your application target's "Build Phases" settings tab and choose New Run Script Phase. Create a run script with the following content:
- Add the path to the
LineSDK.frameworkfile under the "Input Files" section: - Add the path to the
LineSDK.frameworkfile under the "Output Files" section:
The run script should look like this:
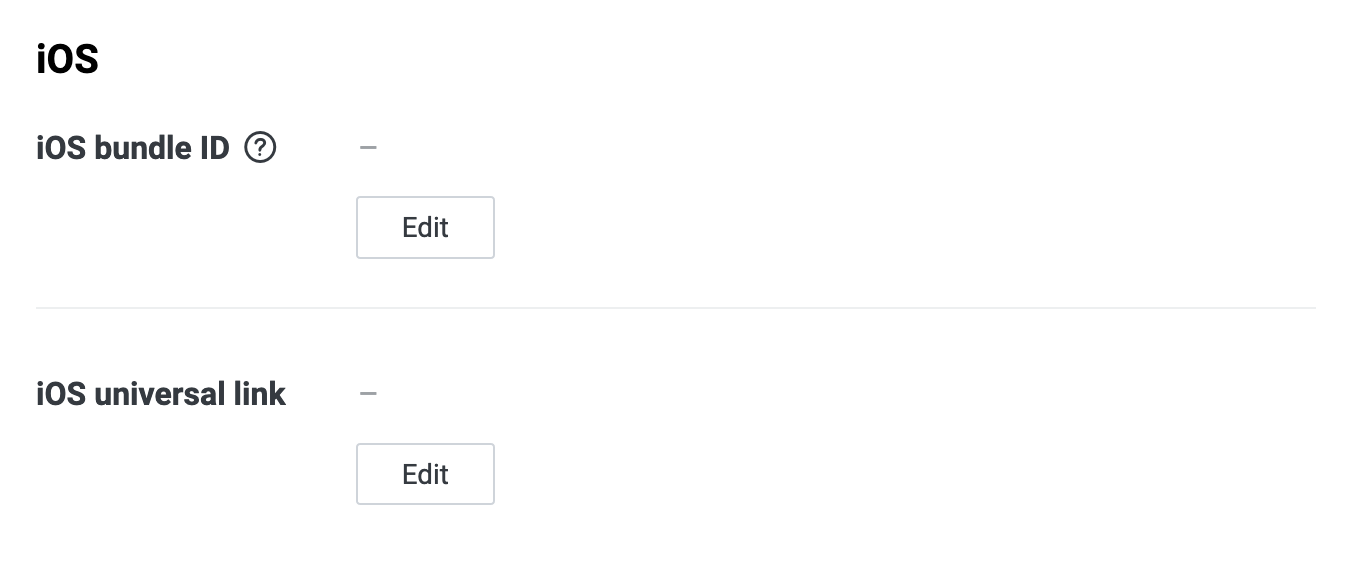
Linking your app to your channel
Linking your app to a LINE Login channel requires some configuration. On the LINE Developers Console, go to your LINE Login channel settings and complete the following fields on the LINE Login tab:
- iOS bundle ID: Bundle identifier of your app found in the "General" tab in your Xcode project settings. Must be lowercase. For example,
com.example.app. You can specify multiple bundle identifiers by entering each one on a new line. - iOS universal link: Enter the universal link configured for your app. For more information on how to handle the login process using a universal link, see Using universal links.
Configuring the Info.plist file
In Xcode, right-click your app's Info.plist file and select Open As > Source Code. Insert the following snippet just before the last </dict> tag:
This snippet adds the following settings:
| Key | Description |
|---|---|
| CFBundleURLSchemes | Use line3rdp.$(PRODUCT_BUNDLE_IDENTIFIER) to define the URL scheme needed to open your app. iOS stores this URL scheme for later reference. LINE Login uses this scheme to open your app after the LINE Platform returns a login result. Note: The URL scheme lineauth2 is already used to activate LINE. Do not use this scheme in CFBundleURLSchemes. |
| LSApplicationQueriesSchemes | Specify lineauth2 to allow launching of LINE from your app. The app will launch LINE as part of the login process. |