Integrating LINE Login with your web app
LINE Login v2.1 supports the OpenID Connect protocol and allows you to retrieve user data with ID tokens. In this guide, we explain how to build it into your web app.
You can follow along using a sample app if you don’t have an existing app that you can update to support LINE Login. To learn more, see Getting started with LINE Login.
- If you are integrating LINE Login v2.0 with your web app, see Integrating LINE Login (v2.0) with your web app.
- We strongly recommend building your LINE Login integration with a LINE SDK if it's available for your development environment. We don't recommend using the procedure described in this page for native apps. For more information on using a LINE SDK, see Integrating with native apps.
Login flow
The LINE Login process for web apps (web login) is based on the OAuth 2.0 authorization code grant flow and the OpenID Connect protocol. An overview of the web login flow is shown below.
Web apps must implement any part of the login flow that is relevant to them in the flowchart.

Create a channel
Create a LINE Login channel and configure it for use with a web app.
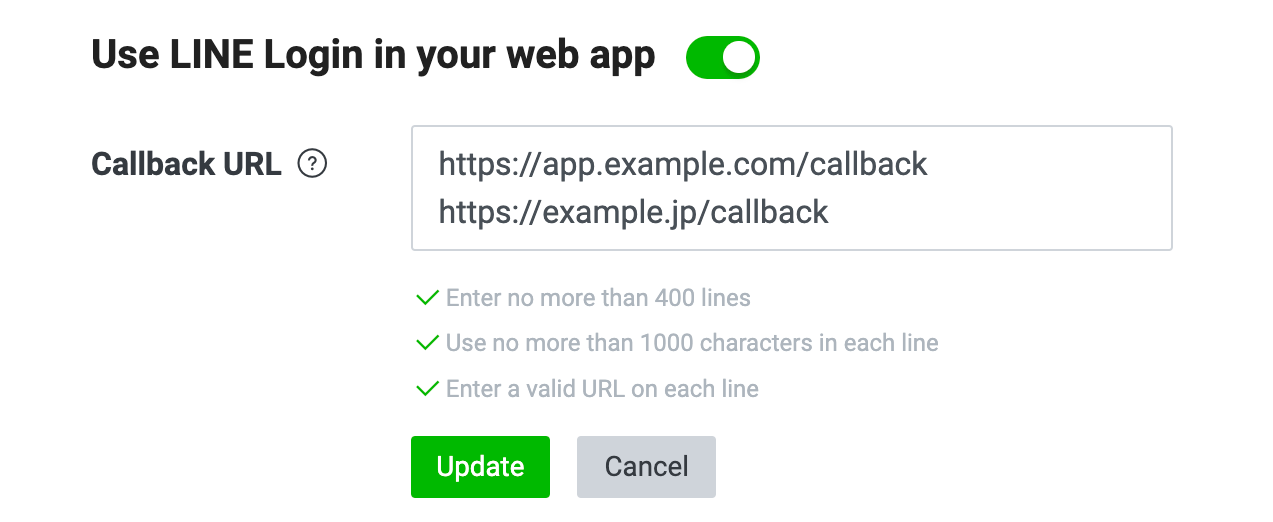
Setting a callback URL
After the user has been authenticated and authorized your web app, the authorization code and state are sent to the callback URL.
Set a callback URL from the LINE Login tab of your channel settings in the LINE Developers Console. You can specify multiple callback URLs per channel by adding a new line.
Requesting permission to access the user's email address
LINE Login v2.1 allows you to obtain the email address of any user who has logged in to your app using LINE Login.
To obtain a user's email address with a web app, you must first apply for permission to do so in the LINE Developers Console.
- On the Basic settings tab, under OpenID Connect, click Apply.
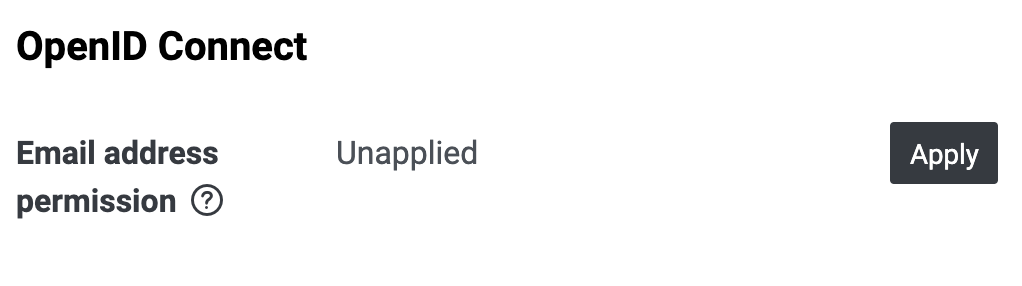
- Agree to the terms and upload a screenshot of the screen that explains that you're collecting the user's email address and what you're using it for.
Once your application form has been accepted, "Applied" is displayed under Email address permission.
Authenticating users and making authorization requests
Initiate the process of authenticating the user with the LINE Platform and authorizing your app. When the user clicks a LINE Login button, redirect them to an authorization URL with the required query parameters, as shown in the example below.
You can pass these query parameters to the authorization URL.
| Parameters | Type | Required? | Description |
|---|---|---|---|
response_type | String | Required | code |
client_id | String | Required | LINE Login Channel ID. You can find this in the LINE Developers Console. |
redirect_uri | String | Required | A URL-encoded string of the callback URL registered on the LINE Developers Console. You can add any query parameter. |
state | String | Required | A unique alphanumeric string used to prevent cross-site request forgery. Your web app should generate a random value for each login session. This cannot be a URL-encoded string. |
scope | String | Required | Permissions requested from the user. For more information, see Scopes. |
nonce | String | Optional | A string used to prevent replay attacks. This value is returned in an ID token. |
prompt | String | Optional | A setting that determines whether or not to display the authentication or authorization screen. You can set one of the following values:
|
max_age | Number | Optional | The allowable elapsed time in seconds since the last time the user was authenticated. Corresponds to the max_age parameter defined in the "Authentication Request" section of OpenID Connect Core 1.0. |
ui_locales | String | Optional | Display language for LINE Login screens. Specify as one or more RFC 5646 (BCP 47) language tags, separated by spaces, in order of preference. Corresponds to the ui_locales parameter defined in the "Authentication Request" section of OpenID Connect Core 1.0. |
bot_prompt | String | Optional | Displays an option to add a LINE Official Account as a friend during login. Set to either normal or aggressive. For more information, see Add a LINE Official Account as a friend when logged in (add friend option). |
initial_amr_display | String | Optional | If lineqr is specified, Log in with QR code will be displayed by default instead of Log in with email address. |
switch_amr | Boolean | Optional | If set to false, hide the buttons for changing the login method, such as "Log in with email" or "QR code login". The default value is true. |
disable_auto_login | Boolean | Optional | If set to true, auto login will be disabled. The default value is false.When this value is true, Single Sign On (SSO) login will be displayed if SSO is available, and log in with email address will be displayed if it is not available. |
disable_ios_auto_login | Boolean | Optional | If set to true, auto login will be disabled in iOS. The default value is false. We recommend using the disable_auto_login parameter, which was added later. |
code_challenge | String | Optional | Parameters required to support PKCE for LINE Login. This is the value obtained by hashing the unique code_verifier with SHA256 and then encoding it into Base64URL format. The default value is null. If no value is specified, the request doesn't support PKCE.For more information on how to implement PKCE, see Implement PKCE for LINE Login in the LINE Login documentation. |
code_challenge_method | String | Optional | S256(Represents the hash function SHA256.)Specifies the code_verifier transformation method. For security reasons, LINE Login only supports S256.For more information on how to implement PKCE, see Implement PKCE for LINE Login in the LINE Login documentation. |
response_mode | String | Optional | A setting that determines how authorization response parameters are returned to your web app. You can set one of the following values. The default value is
query defined in the 2.1. Response Modes section of OAuth 2.0 Multiple Response Type Encoding Practices.*2 Corresponds to form_post defined in the 2. Form Post Response Mode section of OAuth 2.0 Form Post Response Mode.*3 Corresponds to query.jwt, form_post.jwt, and jwt defined in the 4.3. Response Encoding section of Financial-grade API: JWT Secured Authorization Response Mode for OAuth 2.0 (JARM). |
- Follow the LINE Login button design guidelines when adding a LINE Login button to your web app.
- You can also link directly to an authorization URL without showing a LINE Login button.
- The user's authentication credentials aren't sent to your web app.
The behavior of LINE Login authorization requests within the LIFF browser is not guaranteed. Also, when opening the LIFF App from an external browser, use liff.login() instead of authorization requests through LINE Login.
Scopes
You can specify the following scopes with the scope parameter. To specify multiple scopes, separate them using a URL-encoded whitespace character (%20).
| Scope | Profile information | ID token (including user ID) | Display name in ID token | Profile image URL in ID token | Email address in ID token |
|---|---|---|---|---|---|
profile | ✓ | - | - | - | - |
profile%20openid | ✓ | ✓ | ✓ | ✓ | - |
profile%20openid%20email | ✓ | ✓ | ✓ | ✓ | ✓ (see note) |
openid | - | ✓ | - | - | - |
openid%20email | - | ✓ | - | - | ✓ (see note) |
The user authorizes the specified scopes on the consent screen. When you specify the profile or openid scope, its corresponding permission is displayed as required. For more information, see User authorization.
Note: Before you can specify the email scope and ask the user for permission to obtain their email address, you must first submit an application requesting access to users' email addresses.
- If you wish to obtain the information (name, gender, birthday, phone number, address) that users have registered with LINE Profile+, you need to undergo the application process. For more information, see LINE Profile+ in the options for corporate customers documentation.
- You need an access token with the
profilescope to determine whether a user has added a LINE Official Account as a friend.
User authentication
Web apps that support LINE Login don't have to implement the authentication process themselves.
Users can log in through one of the following authentication methods once they have been redirected to an authorization URL.
| Authentication method | Description |
|---|---|
| Auto login | Log in without user operation. The LINE Login screen or the confirmation screen is not displayed |
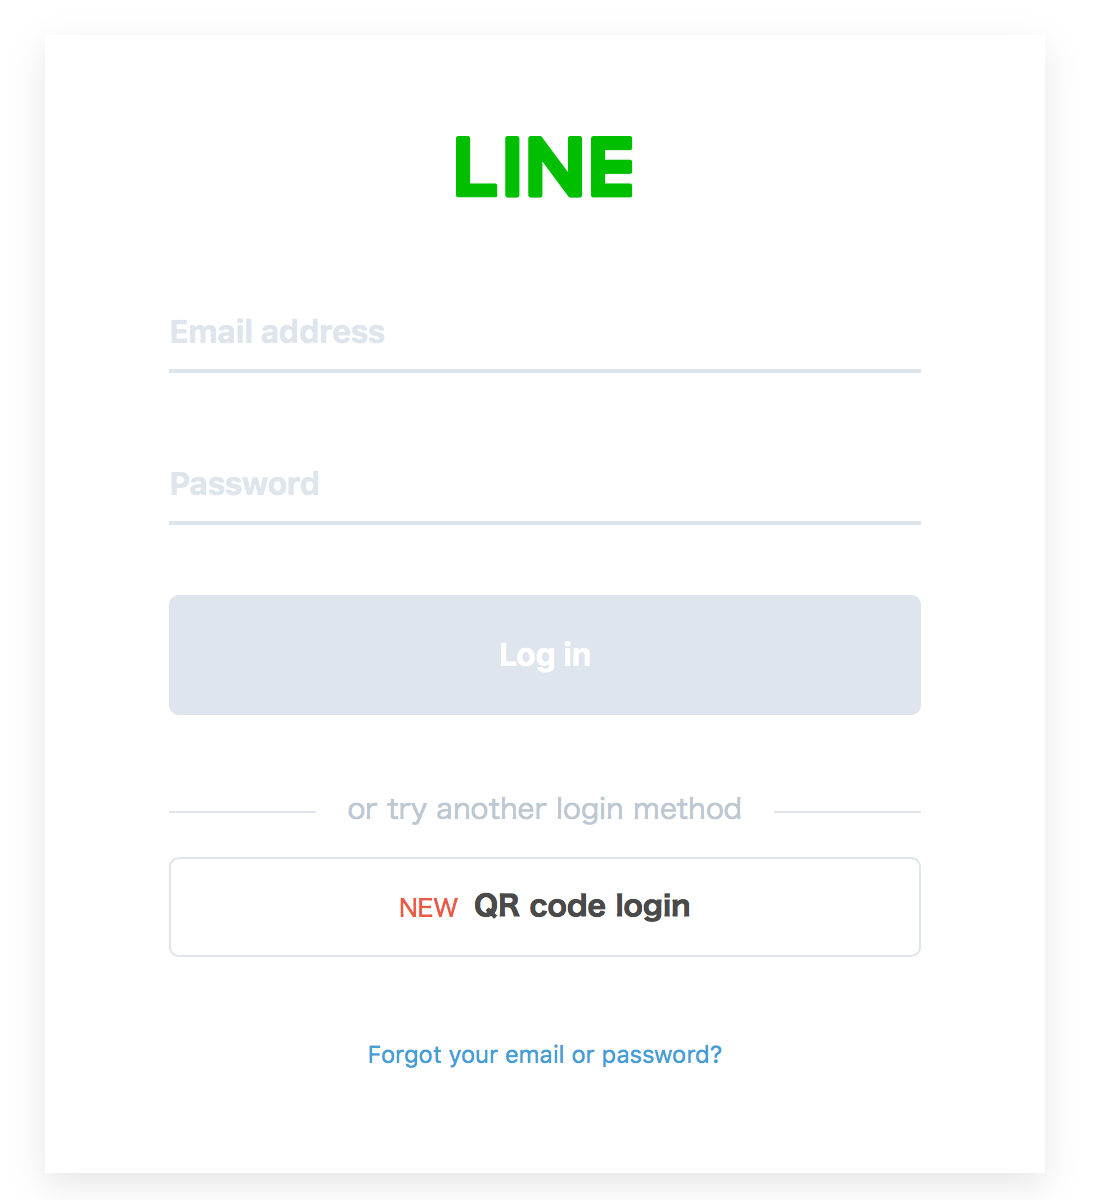
| Log in with email address | Log in by entering an email address and password on the LINE Login screen |
| Log in with QR code | Log in by scanning a QR code displayed on the LINE Login screen using the QR code reader on the LINE app for smartphones |
| Single Sign On (SSO) login | Log in by clicking the login button on the confirmation screen showing "Continue as" |
In an environment where auto login is available, auto login will take precedence. When auto login is not available, Single Sign On (SSO) login will be displayed if SSO is available, and log in with email address will be displayed if it is not available.
Auto login takes precedence in an environment where both auto login and SSO login are enabled. For more information, see the news "Auto login will take precedence over SSO login for LINE Login" published on July 12, 2021.
If you want users to log in via SSO login instead of auto login, you can disable auto login by adding a specific query parameter (disable_auto_login) to the authorization URL when Authenticating users and making authorization requests.
After you log in, a login notification is sent from the LINE Official Account. For more information about login notifications, see I got a notification about a detected login in Help Center.
You can examine the ID token to determine which authentication method was selected by the user. To learn more about ID tokens, see the "Response" section of Getting an access token.
Auto login
Login is enabled without user operation. The LINE Login screen or the confirmation screen isn't displayed.
Users are automatically logged in when they visit an authorization URL from one of the following browsers while logged in to LINE's smartphone app.
- LINE's in-app browser
- External browser used for LINE Login
As shown below, the LINE app is automatically launched upon login, and the user is logged in without any operation:
For more information on environments that can use auto login, see How does auto login work? in the FAQ.
If a user accesses a web app with private browsing enabled, auto login may fail.
In other cases, depending on the specifications of the user's OS, auto login may fail. Since the specifications of the OS aren't fully disclosed, it may be difficult for the LINE Platform to avoid the conditions under which auto login fails.
For more information, see How to handle auto login failure.
Auto login is enabled when accessing a web app that incorporates LINE Login with PKCE implementation from the Yahoo! Japan app. For more information on PKCE support for LINE Login, see PKCE support for LINE Login in the LINE Login documentation.
Log in with email address or QR code
A user can login with one of these authentication methods.
- Log in with email address
- Log in with QR code
These login methods can be used when accessing the authorization URL in an external browser for the first time without logging in to the LINE app for smartphones.
Single Sign On (SSO) login
The user can log in only by clicking the login button.
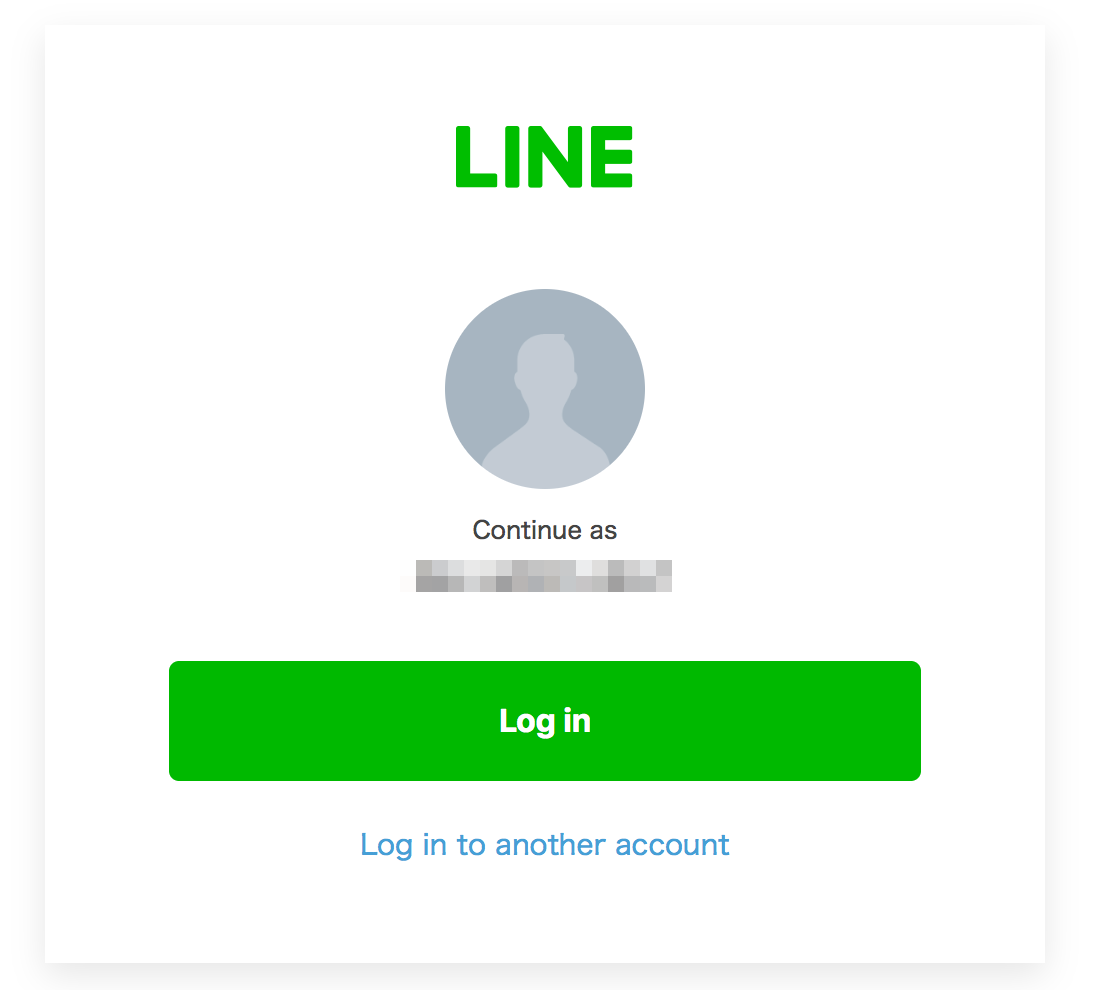
SSO is available when the user visits an authorization URL in an external browser that they used to log in to LINE before.
Once you run LINE Login from your web application, the cookie is saved under the domain name access.line.me. As long as the cookie is valid, the SSO screen is displayed for login in the same browser.
Auto login takes precedence in an environment where both auto login and SSO login are enabled. For more information, see the news "Auto login will take precedence over SSO login for LINE Login" published on July 12, 2021.
If you want users to log in via SSO login instead of auto login, you can disable auto login by adding a specific query parameter (disable_auto_login) to the authorization URL when Authenticating users and making authorization requests.
User authorization
Web apps that support LINE Login don't have to implement the authorization process themselves.
Developers specify the information they'd like to access in the scope parameter, and users are asked to authorize those requests.
Note that users may access your web app without granting it some or all of the requested permissions. When building your web app, you should account for the possibility that the user may not grant the permissions you specified in the authorization URL.
| Consent screen | scope parameter and displayed items |
|---|---|
 |
|
- If the permissions specified in the
scopeparameter areprofileand/oropenidand the user has already granted all the permissions, the consent screen is not displayed. - If the permissions include
email, a consent screen is not displayed for a certain period unless the user's email address changes.
Receiving the authorization response or error response with a web app
The user is redirected to the callback URL once they have completed the authentication and authorization process.
If the user has granted access to your app, an authorization response containing an authorization code is returned. If the user hasn't granted access to your app, an error response is returned.
Receiving the authorization code
Once the user has been authenticated and has completed the authorization step, they are redirected to the callback URL. How the authorization response parameters, including the authorization code, are received depends on the value of the response_mode parameter of the authorization request. For more information, see Authenticating users and making authorization requests.
The authorization response parameters are as follows:
| Parameter | Type | Description |
|---|---|---|
code | String | Authorization code used to get an access token. Valid for 10 minutes. This authorization code can only be used once. |
state | String | A unique alphanumeric string used to prevent cross-site request forgery. Verify that this matches the value of the state parameter given to the authorization URL. |
friendship_status_changed | Boolean | true if the friendship status between the user and the LINE Official Account linked to the channel has changed when the user logs in. Otherwise, the value is false. This parameter is only returned if you specify the bot_prompt query parameter when authenticating users and making authorization requests and the user was given the option to add your LINE Official Account as a friend when they logged in. For more information, see Add a LINE Official Account as a friend when logged in (add friend option). |
liffClientId | String | LINE Login channel ID. This parameter is returned only when the login process is performed using the liff.login() method in the LIFF app. To ensure proper operation of the LIFF app, don't change this parameter. |
liffRedirectUri | String | URL displayed in the LIFF app after login. Value specified in the redirectUri property of the liff.login() method. This parameter is returned only when the login process is performed using the liff.login() method in the LIFF app. To ensure proper operation of the LIFF app, don't change this parameter. |
Example redirect target URL when the query parameter of the authorization request is set to query.jwt:
Example redirect target URL when the response_mode parameter of the authorization request is set to query.jwt or jwt:
Receiving an error response
If the user declines to grant permissions to your app, or if the request fails (except when the client_id or redirect_uri query parameters have invalid values), they are redirected to the callback URL with the following query parameters:
| Parameter | Type | Required | Description |
|---|---|---|---|
error | String | Required | Error code. |
error_description | String | Optional | A description of the error. |
state | String | Optional | The state parameter included in the authorization URL. You can use this value to determine which process was denied. |
Example URL of the redirect target:
Error codes
| Error code | Description |
|---|---|
INVALID_REQUEST | Problem with the request. Check the query parameters of the authorization URL. |
ACCESS_DENIED | The user canceled on the consent screen and declined to grant permissions to your app. |
UNSUPPORTED_RESPONSE_TYPE | Problem with the value of the response_type query parameter. The LINE Login only supports code. |
INVALID_SCOPE | Problem with the value of the
|
SERVER_ERROR | An unexpected error occurred on the LINE Login server. |
LOGIN_REQUIRED | You specified none for the prompt parameter, but auto login couldn't work on the user's device or the user wasn't logged in. |
INTERACTION_REQUIRED | You specified none for the prompt parameter, but auto login couldn't work on the user's device. |
Getting an access token with a web app
You can obtain an access token if the state parameter that you receive along with the authorization code from the LINE Platform matches the state parameter that you specified when authenticating the user and making an authorization request.
For more information on getting an access token, see issue access token in the LINE Login v2.1 API reference.
Example request:
Response
The LINE Platform validates the request and returns an access token and other data as shown in the table below.
New or changed LINE Login functions may cause changes in the structure of the payload JSON object. These changes may include added properties, variations in property order, and added/removed white space and line breaks. Design your backend so that it can handle payload data objects with unexpected structures.
| Property | Type | Description |
|---|---|---|
access_token | String | Access token. Valid for 30 days. |
expires_in | Number | Amount of time in seconds until the access token expires. |
id_token | String | JSON Web Token (JWT) that includes information about the user. This field is returned only if openid is specified in the scope. For more information, see Get profile information from ID tokens. |
refresh_token | String | Token used to get a new access token. Valid up until 90 days after the access token issued. |
scope | String | Permissions granted by the user. However, the email scope isn't returned as a value of the scope property even if the permission has been granted. |
token_type | String | Bearer |
Example response:
To learn more, see Issuing access tokens in the LINE Login v2.1 API reference.
Getting profile information from ID tokens
The LINE Platform issues ID tokens compliant with the OpenID Connect specification, allowing you to securely obtain user profile information (user ID, display name, profile picture, email address) from the LINE Platform.
For more information, see Get profile information from ID tokens.
Next steps
Once you have an access token, you can use it to do the following: