Sending service messages
This feature is only available for verified MINI Apps. For unverified MINI Apps, you can test the feature on the internal channel for Developing, but you can't use the feature on the internal channel for Published.
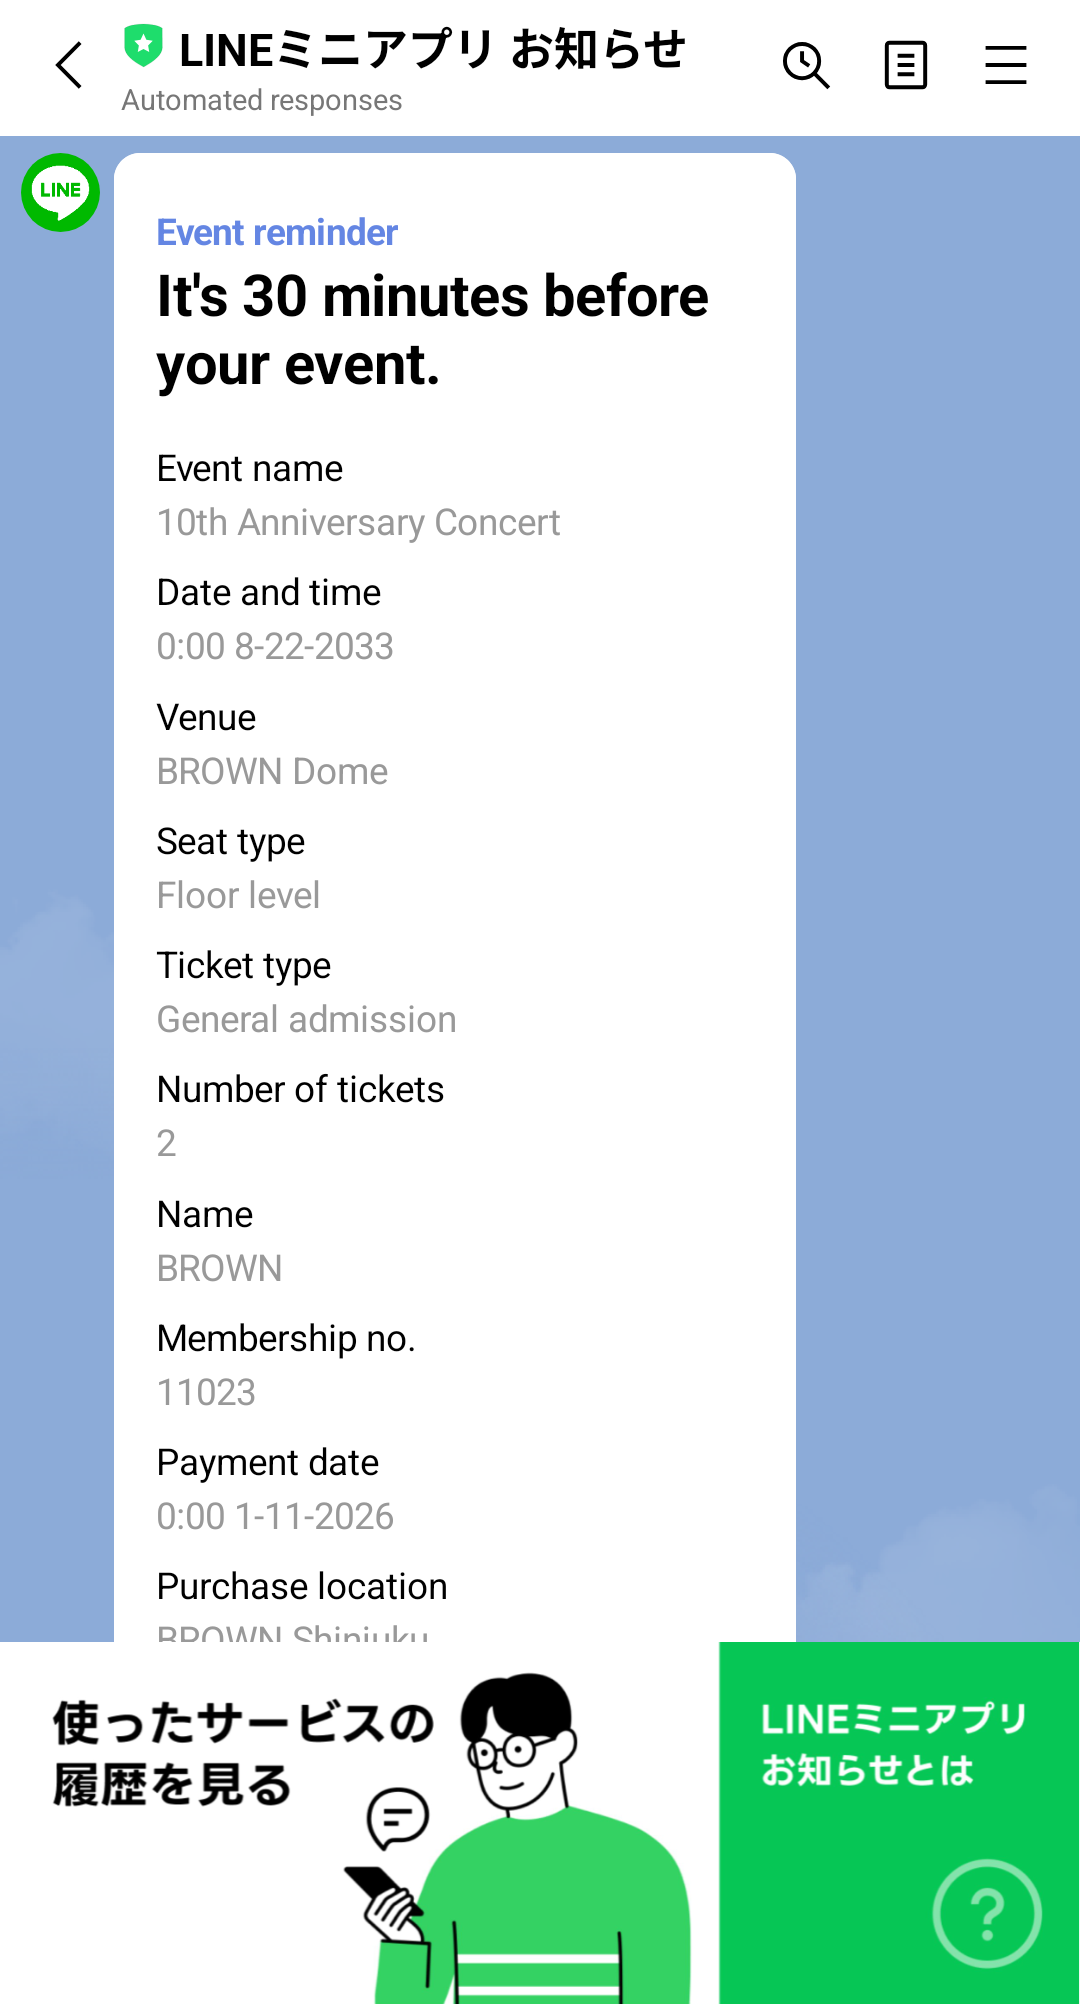
Service messages is a feature of LINE MINI App that enables you to notify the user with information that the user should know as a response to or in confirmation of a particular user action on LINE MINI App. For example, if a user makes a reservation for a restaurant or accommodation on the LINE MINI App, you can send users for a single reservation action up to 5 service messages such as reservation completion or reminder the day before.
You are allowed to send service messages only as a confirmation or response to a user action on LINE MINI App. Advertisements and event notifications are prohibited, including information on discounts, shopping rewards, new products, discount coupons or promotions. For more information about the service message conditions, see Conditions for service messages.
Chat room where service messages are displayed
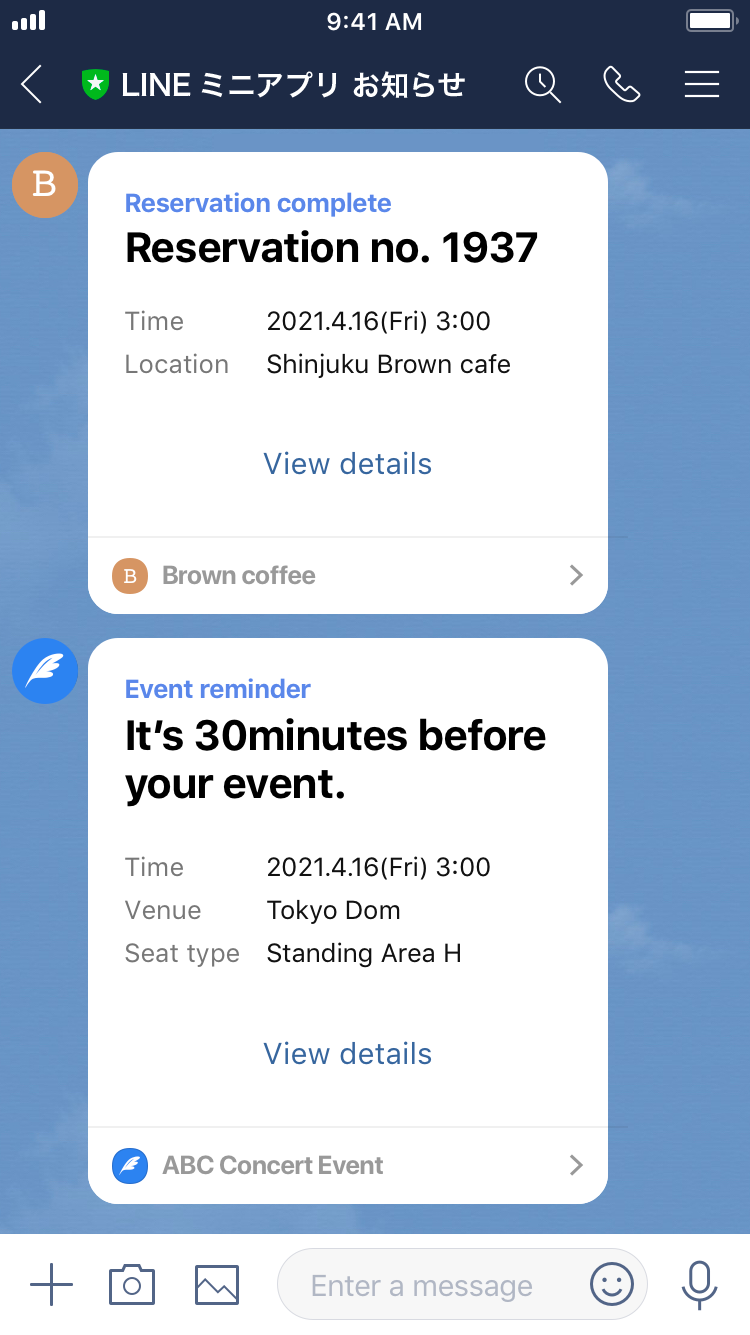
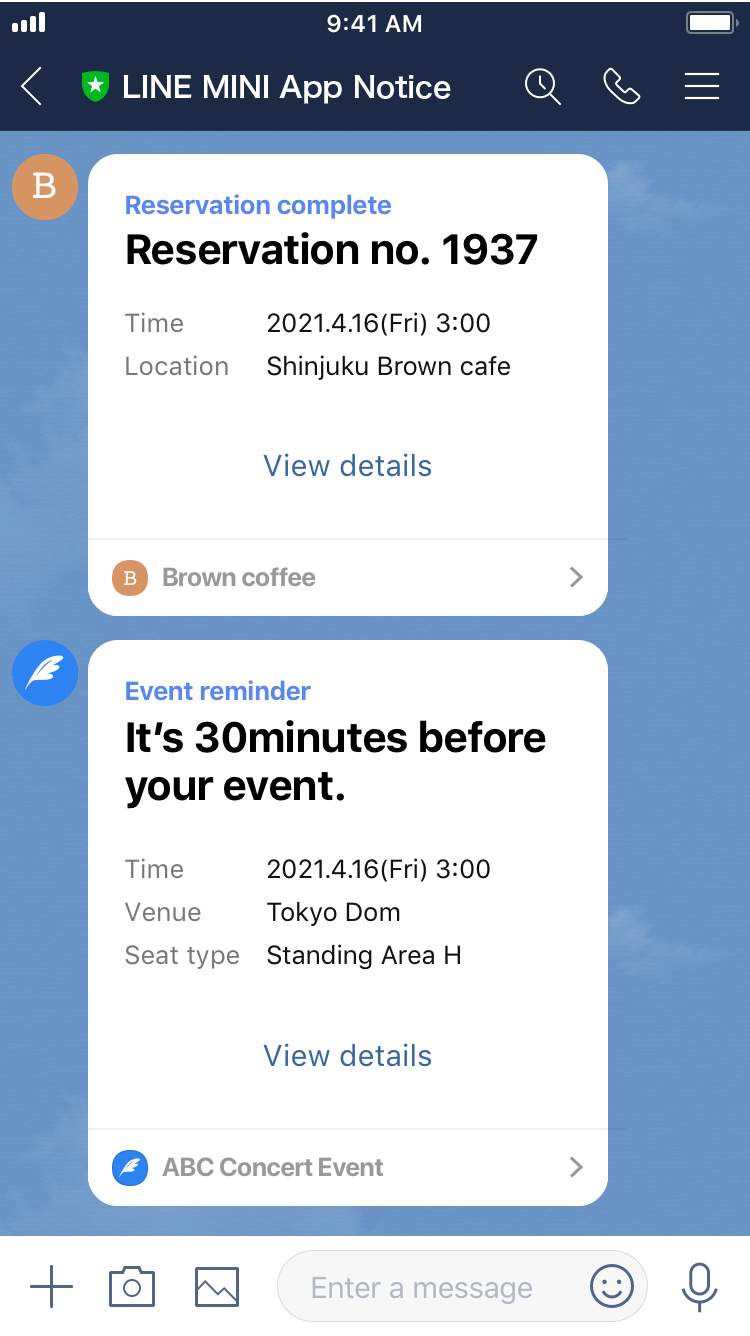
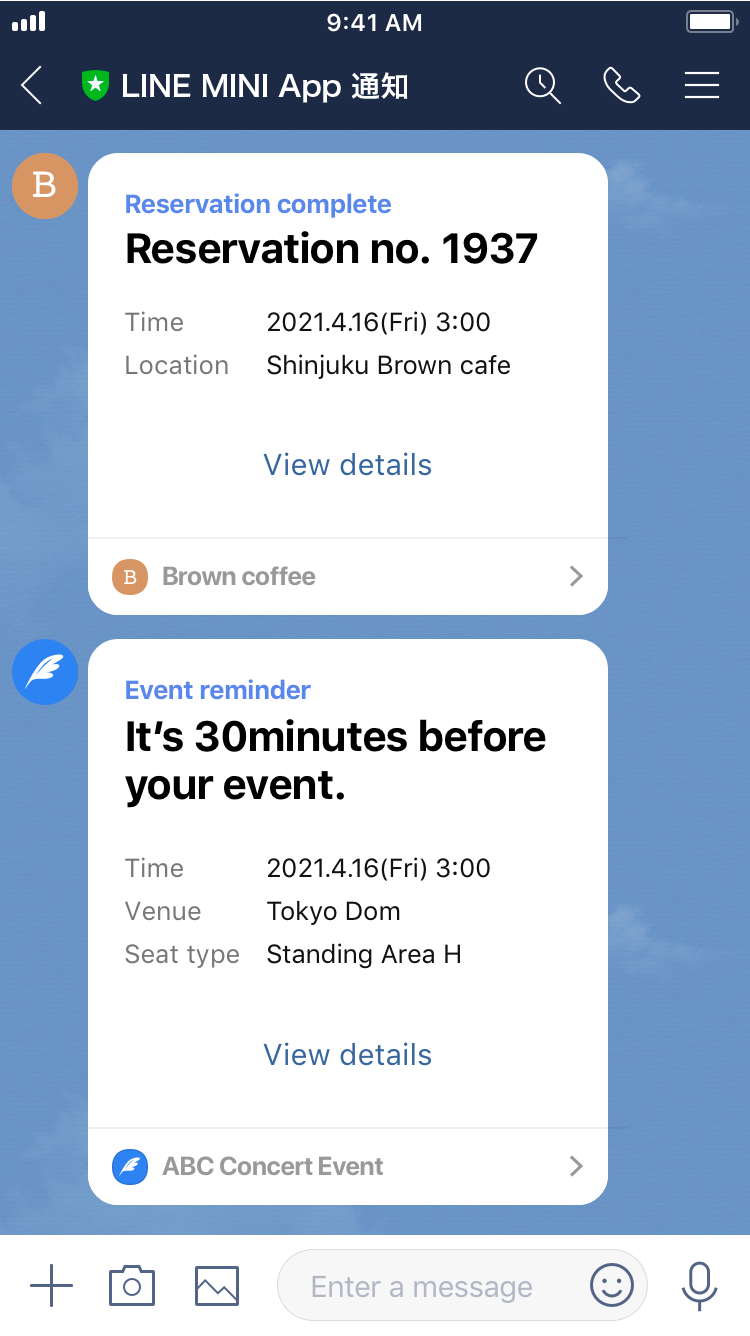
Service messages sent from LINE MINI Apps are displayed in chat rooms determined for each region that provides the LINE MINI App, regardless of the type of LINE MINI App.
| Japan | Thailand | Taiwan |
|---|---|---|
| LINEミニアプリ お知らせ | LINE MINI App Notice | LINE MINI App 通知 |
 |  |  |
Types of service messages that can be sent
You can send service messages using provided templates. These templates are organized by category, such as store reservations, queue management, and delivery notifications, and are available in six languages: Japanese, English, Traditional Chinese, Thai, Indonesian, and Korean. You can view them in the LINE Developers Console.
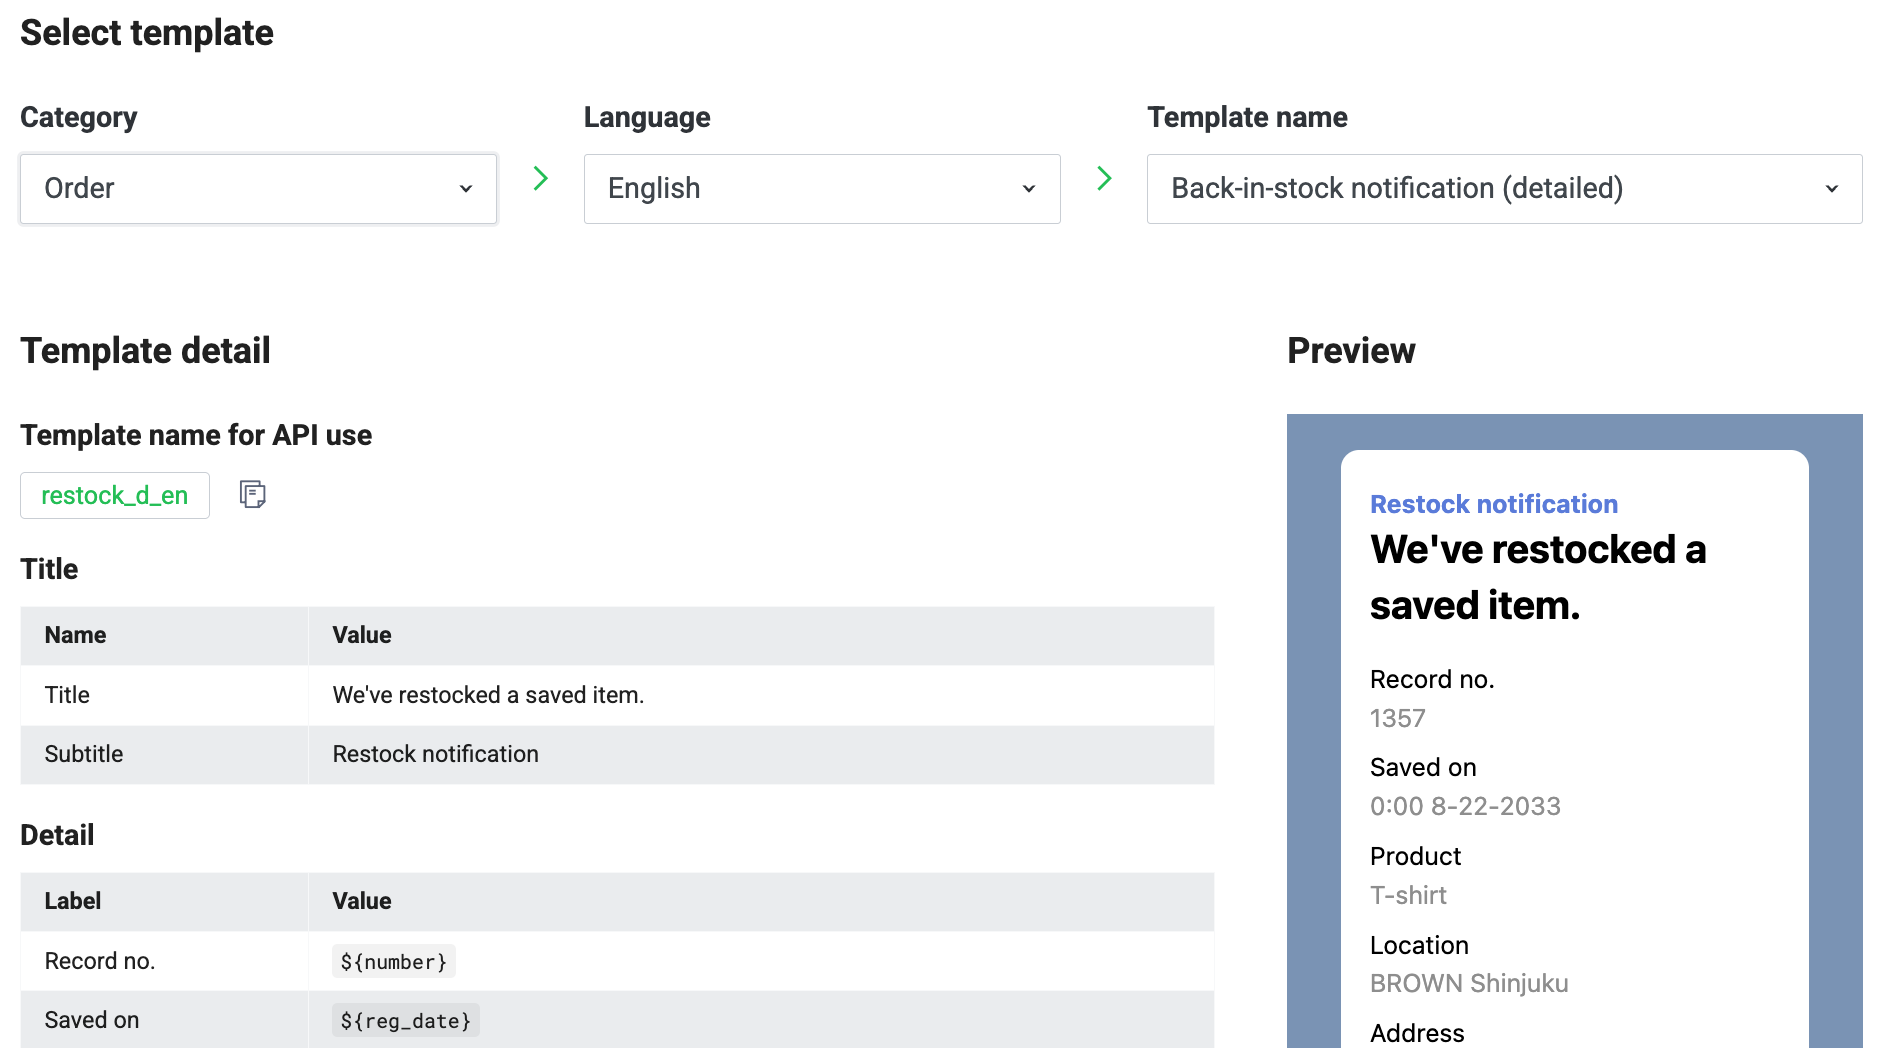
Preview service messages
Select the LINE MINI App channel in the LINE Developers Console, then click Add in the Service message template tab to display the "Add service message template" screen.
On this screen, you can preview messages and send test messages by selecting a template and editing the JSON. Test messages are sent to the LINE account associated with the LINE developer account of the user currently logged in to the LINE Developers Console.

Flow of sending a service message
To send a service message, you need a service message template and a service notification token. Follow these steps to send:
- In the LINE Developers Console, add a service message template to the LINE MINI App channel.
- Issue a service notification token and send a service message based on the user action on LINE MINI App.
- Use the new service notification token issued in step 2 to send a subsequent service message, such as a reminder.
Service message templates added to the LINE MINI App channel in step 1 need to pass review by LY Corporation in order to be used with the Sending service messages API.
Adding service message templates to the channel
From the templates provided by LY Corporation, select a template to use with the Service Message API and add it to the LINE MINI App channel. You can configure up to 20 service message templates per LINE MINI App channel.
Templates are provided by category and you can find them in the LINE Developers Console. You can also send a test message to your LINE account to check a preview of the service message. To add a service message template to the channel, follow the steps:
- From the LINE Developers Console, select the LINE MINI App channel to which you want to add a template and click the Service message template tab.
- You can proceed with preparing the official template while developing your channel.
- During this time, you can:
- Add a new template
- See the list of all templates
- View template detail
- Edit the
use caseof a template - Delete a template
- Send a test message available in the simulator
- When review is in progress, some limitations apply to the use of the official template.
- During this time, you can still:
- See the list of all templates
- Send a test message available in simulator
- View template detail
- However, at this stage, you CANNOT:
- Add a new template
- Edit the
use caseof a template - Delete a template
- Once the channel is published, you can use the official template on the published channel (same condition apply as the preparation stage in #1).
While your channel is under review, you cannot add a new template. You can only send test messages available in the simulator until your channel passes review. The review process, however, doesn't affect existing templates that have successfully been added in the past.
- Click Add.
- Configure these settings:
Item Description Select template Select a template to use with the Service Message API. Template detail The details of the selected template will be displayed. When executing the API for sending service messages, specify the string ( {template name}_{BCP 47 language tag}) displayed in Template name for API use astemplateName.Preview A preview of the test message will be displayed. When you click Send from Send test message, the test message will be sent to the LINE account logged into the LINE Developers Console. Send test message Enter the JSON object that specifies the template variable-value pair. Preview will be updated with your entry. - Copy: Copy the JSON object to clipboard.
- Reset: Discard edits to JSON object.
- Send: Send the test message to the LINE account logged into the LINE Developers Console.
Use Case Enter the exact use case for the template. NoteIf you use templates in a manner that deviates from the explanation you entered in Use Case, we may prevent you from using the templates.
- Click Add.
Return to the list of service message templates.
The status of the review will be displayed in Published status of the added template.Published status Description DEVELOPING Developing (Review not yet requested). This function is only available for sending service messages to developers with Admin or Tester privileges on the LINE MINI App channel, from a channel ready for publication. PUBLISHING Passed review. Used to send service messages from the production channel to the user of the LINE MINI App channel.
Template elements
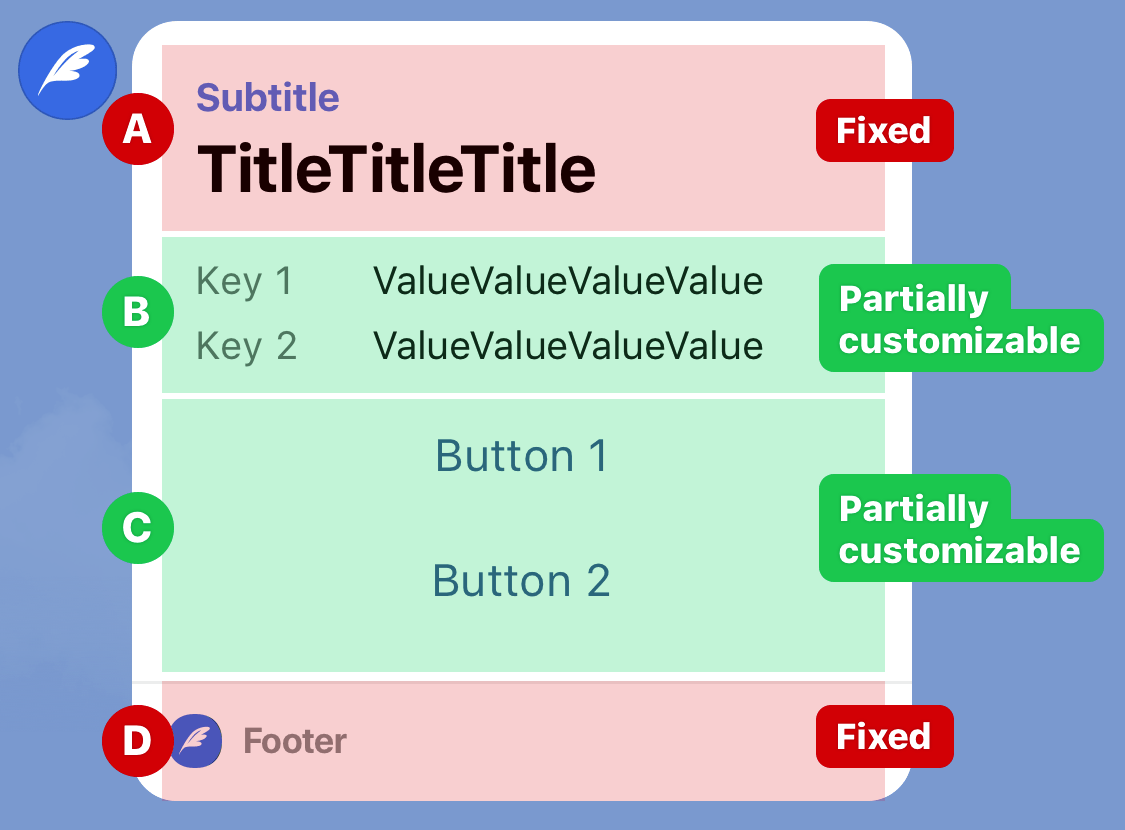
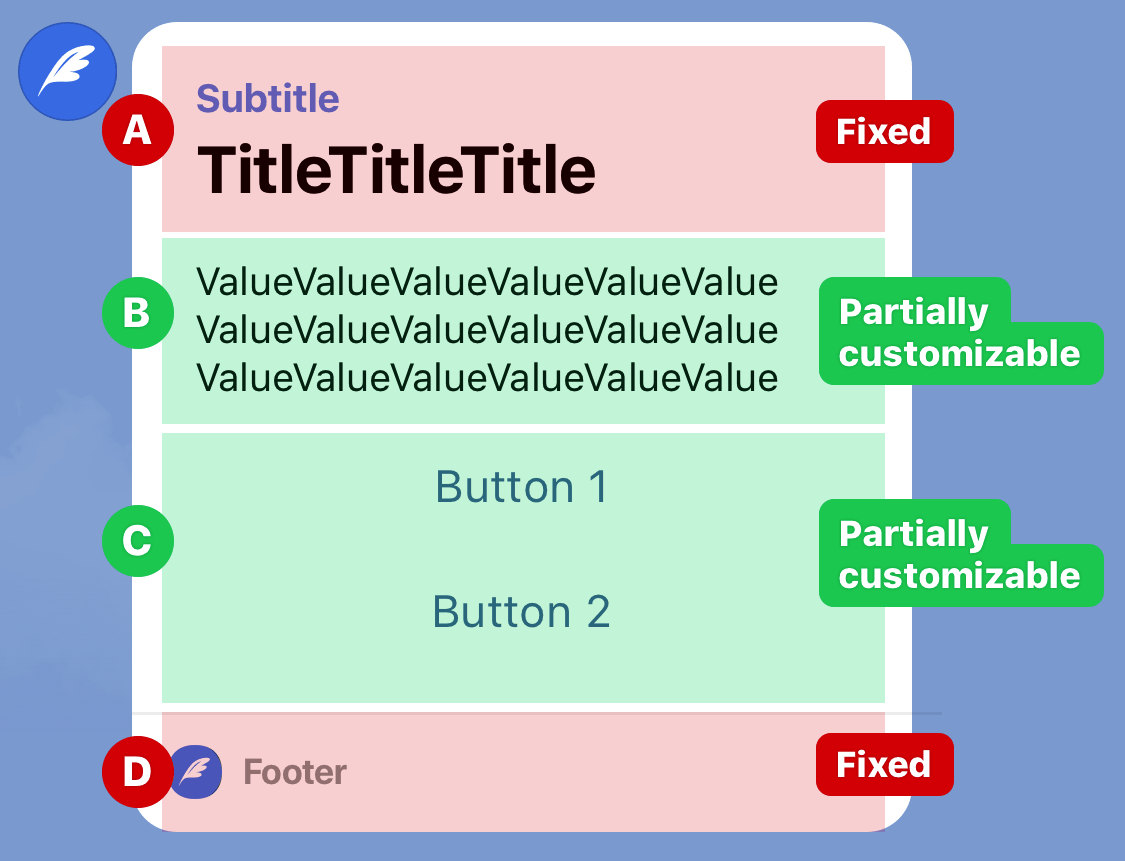
A service message consists of (A) title, (B) detail, (C) button, and (D) footer. Create a template by combining these sections according to the use case. Choose a template that best serves the purpose of your service message.

| Label | Section | Description |
|---|---|---|
| A | Title | The title section consists of these elements.
|
| B | Detail | The detail section has two different layouts depending on template type:
|
| C | Button | The number of buttons you can use differs per template. Also, only buttons with configured URLs are displayed. Specify the Permanent link of your LINE MINI App page as the URL.
|
| D | Footer | The icon set in the Channel icon and the channel name set in the Channel Name in the Basic settings tab are displayed. When the user taps the footer, your LINE MINI App top page will be displayed. |
If the status of your LINE MINI App is "Not yet reviewed" or "Reviewing", the LINE icon along with the text, "Service Message", will be displayed instead of the original footer. Once the status changes to "Reflected", the LINE MINI App icon and LINE MINI App name that you configured will be displayed.
Maximum number of characters for each element
In the Detail section, "detailed" and "simple" have the recommended and maximum number of characters (soft limit and hard limit) for each key value.
| Item | Recommended number of characters | Soft limit | Hard limit |
|---|---|---|---|
| detailed | 10 | 36 | 50 |
| simple | 32 | 100 | 150 |
We recommend that the value of each key be limited to the recommended number of characters. If the recommended number of characters is exceeded, characters overflowing the displayable area will be replaced by an ellipsis (...) or the service message can't be sent.
| Number of characters | How the text is displayed |
|---|---|
| Recommended number of characters or less | All text will be displayed |
| Larger than the recommended number of characters, and the soft limit or less | Characters overflowing the displayable area may be replaced by an ellipsis (...) |
| Larger than the soft limit, and the hard limit or less | Characters overflowing the displayable area are replaced by an ellipsis (...) |
| Larger than the hard limit | Can't send service message due to error |
The number of characters in the key values is counted in grapheme cluster units rather than UTF-16 code units. For more information about counting text characters, see Character counting in a text in the Messaging API documentation.
Sending service messages for the first time
Here are the steps to sending a service message for the first time from the LINE MINI App after a user action:
This is an image diagram showing how to issue a service notification token, using a channel access token and an access token obtained by liff.getAccessToken() (hereafter called "LIFF access token"), to send a service message. In this image, a stateless channel access token is used as the channel access token.
Long-lived channel access tokens and channel access token with a user-specified expiration (Channel Access Token v2.1) cannot be used for LINE MINI App channels.
When developing LINE MINI Apps, either stateless channel access tokens or short-lived channel access tokens can be used. Stateless channel access tokens are recommended among those two. Stateless channel access tokens have an unlimited number of issuances, so there is no need for the application to manage the token lifecycle.

- When notifying, call liff.getAccessToken() in the LINE MINI App to get the LIFF access token.
- Send the LIFF access token obtained in step 1 to the server.
- Obtain a channel access token.
- Issue a service notification token.
The channel access token obtained in step 3 and the LIFF access token obtained in step 1 are used.LIFF access token validity periodA LIFF access token is valid for 12 hours after it is issued. However, even within this validity period, the LIFF access token may be revoked due to user actions. Therefore, be careful about when you obtain the LIFF access token.
- When the user closes the LINE MINI App, the LIFF access token may be revoked. For more information, see Behavior when closing the LIFF app in the LIFF documentation.
- When the "Channel consent simplification" feature is enabled, granting additional permissions from the verification screen refreshes the LIFF access token and revokes the previously issued LIFF access token. For more information, see Request permissions other than the
openidscope on the verification screen.
- Sending a service message for the first time.
Use the service notification token obtained in step 4. After sending the service message, save the service notification token included in the response.
If the template you use has template variables, specify the key-value pair in theparams. If you do not specify the template variable for the required element, an error will be returned.
Example ofparams:
A service notification token expires 1 year (31,536,000 seconds) after being issued. For example, during the validity period, up to 5 service messages can be sent from the LINE MINI App for a single reservation action by the user. For more information on sending subsequent service messages, see Sending subsequent service messages.

Sending subsequent service messages
When you send subsequent service messages for the same user action, use the service notification token that was included in the response when you last sent the service message. Even when sending subsequent service messages, save the service notification token included in the response.
For sending a subsequent service message, don't issue a service notification token by reusing the channel access token and the LIFF access token used to send the first service message.
Save the service notification token included in the response
After sending a service message, keep the updated service notification token (notificationToken) included in the response. This service notification token will be used to send subsequent service messages for the same user action.
You can send service messages for the same user action as many times as the number of remainingCount included in the response as long as the token hasn't expired. Each user action can be identified by the session ID (sessionId) included in the response.